Doug Kerr
Well-known member
As many of you know, I do not regularly use Photoshop, and am not very fluent with even its basic tools. Thus I am perhaps eminently unqualified to offer hints on its use.
Still, when I decide I need to know how to do something, I may look at it with a fresh approach, perhaps informed by an exhaustive study of one tiny part of the application's nature. And perhaps that outlook will be helpful to other, more experienced, workers.
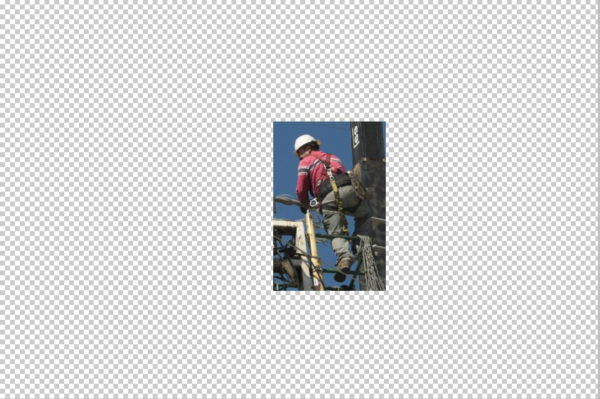
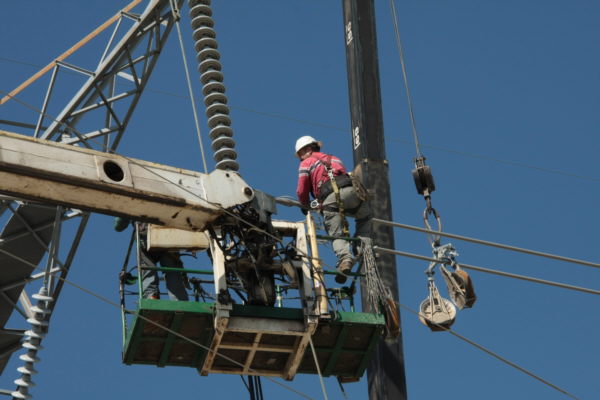
I began doing some work that required me to generate pixel masks to isolate certain objects from the overall content of a certain layer. I was at first frustrated by the context - mainly just how do I see what I am doing.
The answer was by way of the proper exploitation of basic Photoshop capabilities.
I thought I would review my conclusions here. Some, even experienced with the application, may not have realized how these simple tools can facilitate the operation I describe. And of course there may well be those here who can tell me of an even easier way to do it.
I won't describe the procedure as such. Rather, I will describe the state in which I work.
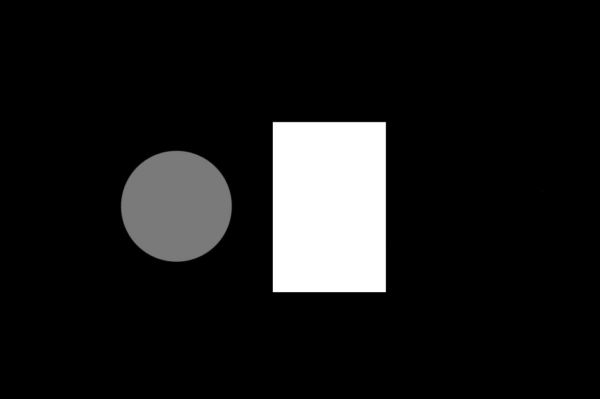
I work with the system in this state; the layer on which I work will be called here the "working layer":
• Working layer visible
• All other content layers invisible
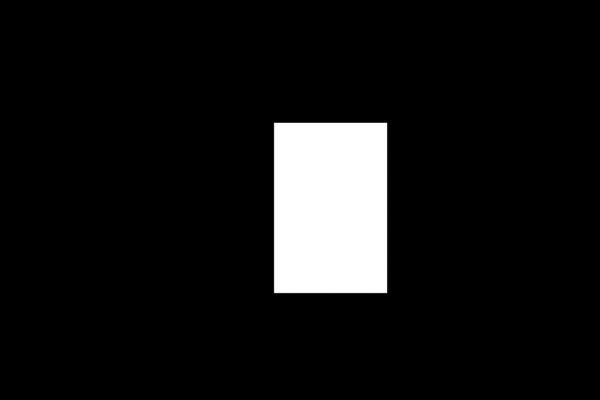
• Pixel (“layer”) mask on the working layer, initially all-opaque.
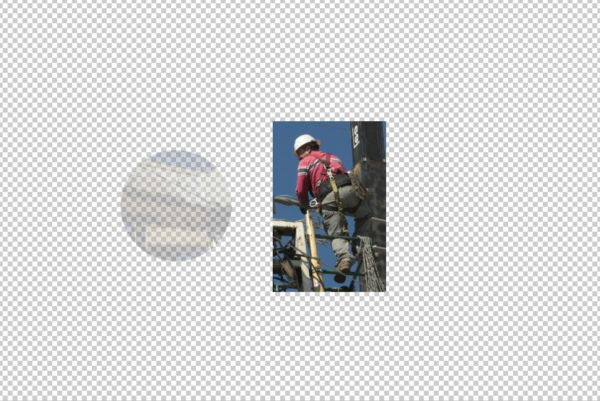
• Pixel mask disabled (allows us to see the entire image on the working layer).
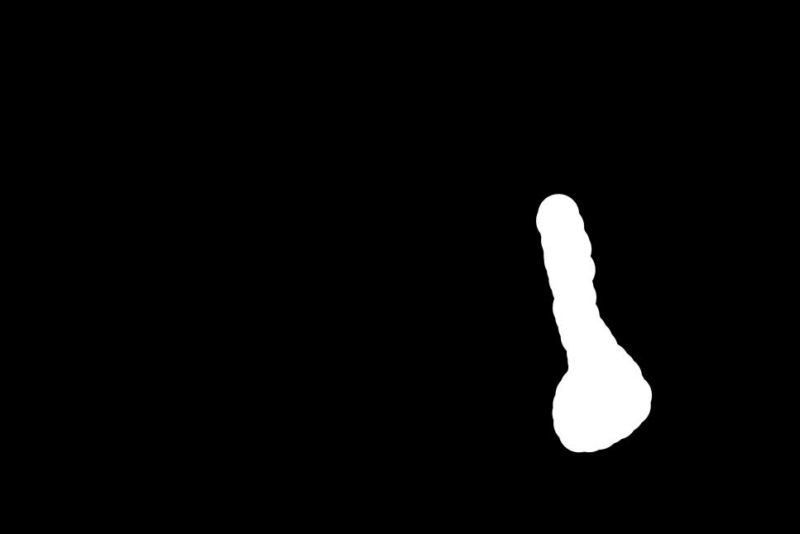
• Red overlay in effect for the pixel mask (allows us to see where we have “opened” the mask). (It may be helpful to use a mask opacity less than the default 50%.)
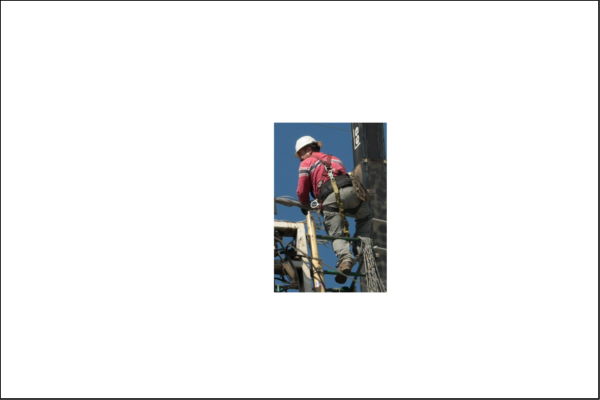
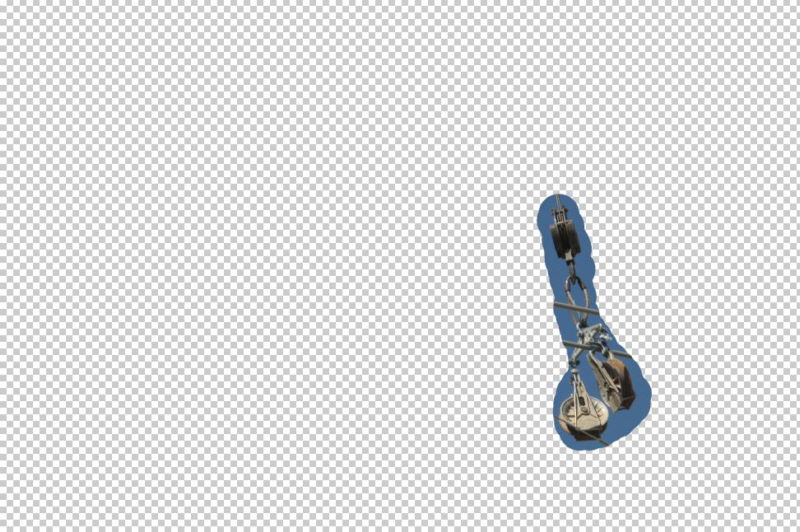
Then, with the pixel mask selected, I draw transparent areas with a brush with white, and then where needed restore areas to the opaque state by drawing with black. (I was never good at painting within the lines!) The transparent area (showing the part of the content that is to be "retained") will lose its red overlay.
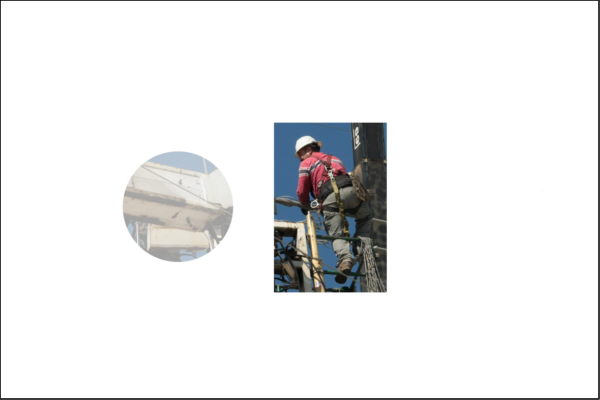
When we are done, the pixel mask should be re-enabled (to ensure that only the chosen parts of the content of the layer will appear in the overall image buildup).
There are of course numerous keyboard shortcuts to facilitate this, including:
• Establish a pixel mask on the working layer, initially all-opaque: with the working layer selected, Alt-click on the "Add a pixel mask" icon on the Masks panel.
• Disable the pixel mask on the working layer: with the working layer selected, Shift-click on the pixel mask thumbnail.
• Enable the red overlay (showing the opaque regions of the mask): with the working layer selected, Alt-Shift-click on the pixel mask thumbnail.
• Shift between white and black "ink" in the drawing brush: key X. (If somehow some other color got into that palette, key D to nominate black and white; black will then be "up"; key D if you need white.)
Well, that's it. No big news I'm sure.
Best regards,
Doug
Still, when I decide I need to know how to do something, I may look at it with a fresh approach, perhaps informed by an exhaustive study of one tiny part of the application's nature. And perhaps that outlook will be helpful to other, more experienced, workers.
I began doing some work that required me to generate pixel masks to isolate certain objects from the overall content of a certain layer. I was at first frustrated by the context - mainly just how do I see what I am doing.
The answer was by way of the proper exploitation of basic Photoshop capabilities.
I thought I would review my conclusions here. Some, even experienced with the application, may not have realized how these simple tools can facilitate the operation I describe. And of course there may well be those here who can tell me of an even easier way to do it.
I won't describe the procedure as such. Rather, I will describe the state in which I work.
I work with the system in this state; the layer on which I work will be called here the "working layer":
• Working layer visible
• All other content layers invisible
• Pixel (“layer”) mask on the working layer, initially all-opaque.
• Pixel mask disabled (allows us to see the entire image on the working layer).
• Red overlay in effect for the pixel mask (allows us to see where we have “opened” the mask). (It may be helpful to use a mask opacity less than the default 50%.)
Then, with the pixel mask selected, I draw transparent areas with a brush with white, and then where needed restore areas to the opaque state by drawing with black. (I was never good at painting within the lines!) The transparent area (showing the part of the content that is to be "retained") will lose its red overlay.
When we are done, the pixel mask should be re-enabled (to ensure that only the chosen parts of the content of the layer will appear in the overall image buildup).
There are of course numerous keyboard shortcuts to facilitate this, including:
• Establish a pixel mask on the working layer, initially all-opaque: with the working layer selected, Alt-click on the "Add a pixel mask" icon on the Masks panel.
• Disable the pixel mask on the working layer: with the working layer selected, Shift-click on the pixel mask thumbnail.
• Enable the red overlay (showing the opaque regions of the mask): with the working layer selected, Alt-Shift-click on the pixel mask thumbnail.
• Shift between white and black "ink" in the drawing brush: key X. (If somehow some other color got into that palette, key D to nominate black and white; black will then be "up"; key D if you need white.)
Well, that's it. No big news I'm sure.
Best regards,
Doug


")