• Please use real names.

    Greetings to all who have registered to OPF and those guests taking a look around. Please use real names. Registrations with fictitious names will not be processed. REAL NAMES ONLY will be processed

    Firstname Lastname

    Register

    We are a courteous and supportive community. No need to hide behind an alia. If you have a genuine need for privacy/secrecy then let me know!
  • Welcome to the new site. Here's a thread about the update where you can post your feedback, ask questions or spot those nasty bugs!

Just for Fun No C&C will be given: Shooting an Orchestra in Overhead Light During a Performance: Muffling Shutter Sound!

Asher Kelman

OPF Owner/Editor-in-Chief
Those of you who follow my passion for the experience at The Colburn School of Music, Grand Avenue know that the noise of a DSLR shutter is disturbing to everyone! I have gone around the issue of the unsatisfactory lighting all concert halls seem to have by slightly under-exposing at a lower ISO and then recovering highlights in RAW processing. That delivers excellent newsworthy pictures, albeit with some noise in the blacks but it's not noticeable after reducing the files for publication for print and the web. For large size the noise can be removed.

First the idea of stitching overlapping frames. In order to make a superb print that can be enlarged with detail holding in in a stage full of musicians, I ventured here to zoom in and get the picture in 3 sections. This picture is the first one I have gone that extra step of stitching 3 horizontal frames during a performance with so many limbs moving and the conductor jumping all over the place. That was a huge challenge! (I'll discuss how I solved the shutter sound problem shortly in post # 2 below).

So, I looked for 3 frames where the orchestra was doing the same set of movements in the instruments even though the frames are several apart. I simply used Photoshop's, "Photomerge" under "Automate". The position of the conductor was not the one I wanted so I masked out that figure and unmasked the one I preferred.


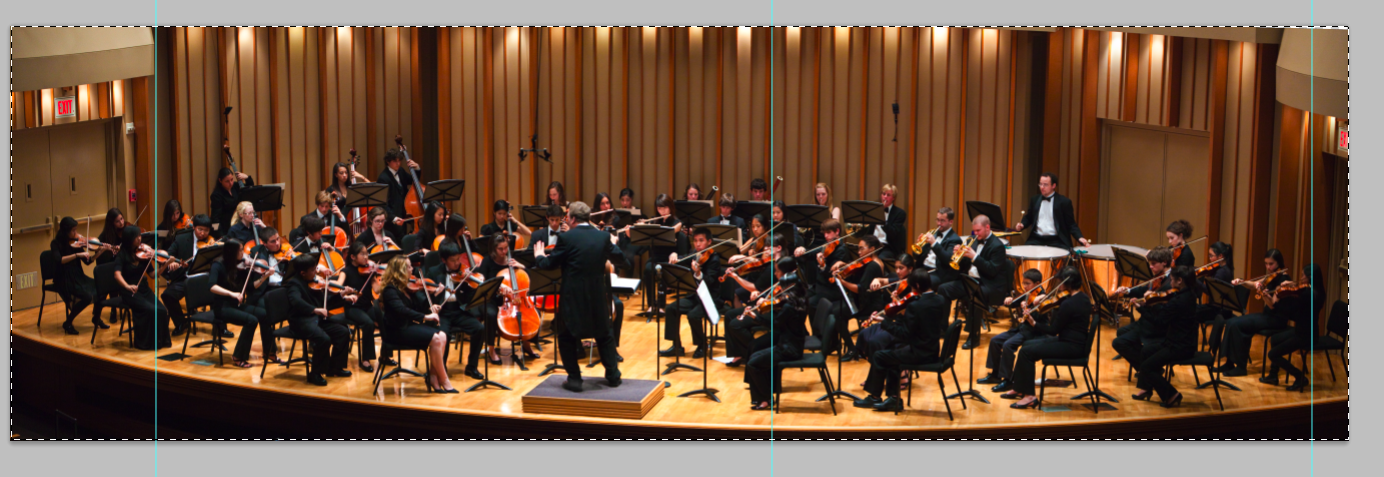
The panostitch showed some perspective issues and here's the result with blue guide lines to reference verticality.


lines to guide perspective correction.png


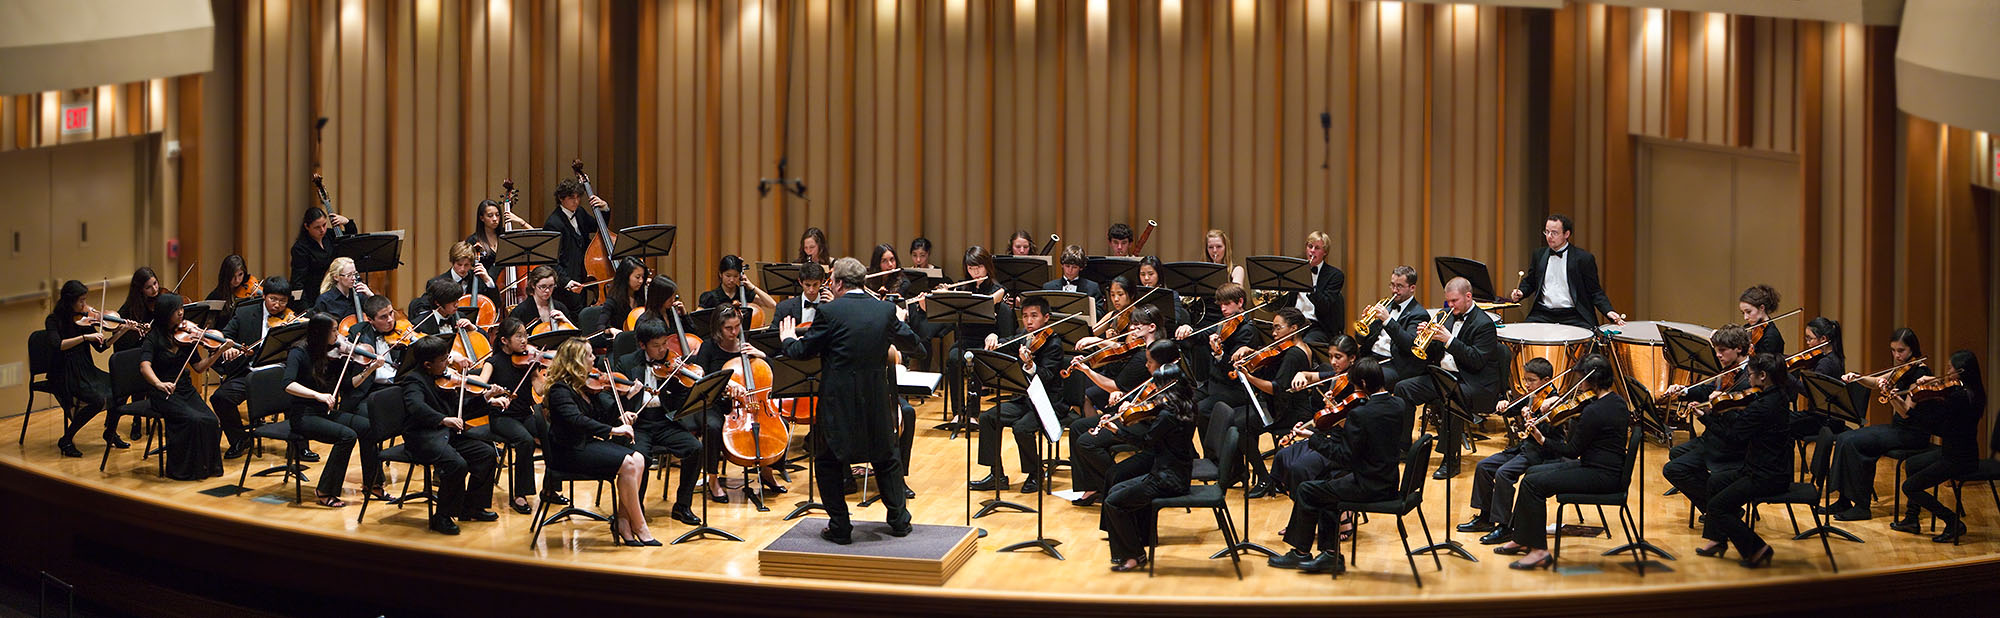
Here's the picture of the Orchestra corrected in Photoshop under Edit-Transform-Perspectve


OrchestraDeCameraColburnSchoolnew conductor pose_PanoPersepctive_2000_sRGB8BIT.jpg

Asher Kelman: The Colburn School Orchestra da Camera

More to follow!

Asher

For the next free performance go to The Colburn School website, here.
 

Asher Kelman

OPF Owner/Editor-in-Chief
Muffling Sound in a live performance!

The click of a shutter can be heard across the entire auditorium where that latter is designed well! So that's the challenge of working in The Zipper Hall at the Colburn School. I'll add photographs of this acoustic wonder later and you'll see that there area lot of treatments to control and modulate sound reflections. The result is a giant high quality music propagation instrument that the orchestra and audience perform and enjoy the music in an intimate cave of unusually high quality sound.

So I tried using the so called silent mode of the Canon DSLR's, but that failed as not only the audience near me heard it but also the players on stage had the distraction, even above the sound of their instruments.

So I went for the Canon G10 digicam with the synthesized shutter sound switched off. That was perfect. no sound at all! However, the images are so noisy over ISO 200 and at the ISO 800 to 1600 color reproduction is a photoshop noise reduction "black hole" of endless time loss.

So I rented a Sound Blimp and shot at Colburn's Ballet performances and that worked. However, at over $1,000, that's an expensive solution and still not perfectly silent.

So this last Sunday I used something different! Bedding, LOL :)

I first set up, as usual my 5DII with the 700-200 mm 2.8 IS lens set to AF and focused the camera, touched that up with manual focus and then set the camera to manual mode, (under exposed by 0.7 stop that day).

I wrapped the camera in a folded black sheet covering the lens body and the camera, overlapping but not totally covering the back. I just needed to get access to the viewfinder. I then positioned the camera to frame the players and covered the wrapped camera with another black pillow and holding the camera with my right hand, leaned my body forward, obliterating air pockets and steadying the aim of the camera so the frame wouldn't shift. I soon learned to accommodate that. To my relief, no one heard the shutter. I could hear a very low dull "tub!" sound. I had a Viola player right next to me and she couldn't hear any shutter noise.

My next stage will be to use live view and control the camera from my laptop. Ultimately, I'll build my own sound blimp. Still, it's gratifying that stubborn perseverance can pay off, at least sometimes!

Asher
 

Asher Kelman

OPF Owner/Editor-in-Chief
Hi Asher,
I only have a quick moment to post this but I'd thought I'd share.
Here's a great tutorial on building your own sound blimp:
http://silentpenguin.blogspot.com/2008/06/kyles-sound-blimp-tutorial.html

Thanks John,

Thanks for this great link! This particular tutorial using a Pelican waterproof case is new to me but I'm aware of an L.A. based D.I.Y er who lives near me! I was going to call him. This new description seems a little more elegant, although, frankly the workmanship depends on the person! So that's a possibility. Mine is already superior to the blimp. Just not too elegant. In fact, it's downright weird, but it's free and works. I have my own spaces assigned to shoot, so for now it's fine. The big thing is obtaining 100% orthogonal alignment. I'm thinking of a T/S lens so I don't have to do any vertical perspective adjustments.

The cameras don't sit in the Sound blimp case in a fixed position relative to the tripod mount. I like the idea that the 7D has a vertical alignment capability in the eyepiece. Now if that can be translated to live view, that would be great. I think I might make a large test card to work out orthogonality and calibrate the blimp if I build or buy one. It would be good to know if there are add on stages with sensors to check for level.

The idea is to be able to end up with a refined protocol so that there's the least need for processing. So orthogonality and lighting are important matters to address in the long run. One can get around all the obstacles, but it's at the cost of a large amount of time without an accurate setup.

Asher
 

Doug Kerr

Well-known member
Hi, Asher,

Very crafty.

Remember, the "limp" in the term "Blimp" originally indeed meant "limp"!

Best regards,

Doug
 
It would be good to know if there are add on stages with sensors to check for level.

Hi Asher,

Just a reminder about a very useful tool:
http://www.openphotographyforums.com/forums/showthread.php?t=9447

Also don't forget that the built in camera levels have a limited accuracy (approx. 1 degree, which is a lot of pixels), and that the sensor is also mounted within mechanical tolerances for rotation and orientation perpendicular to the optical axis.

Cheers,
Bart
 

Asher Kelman

OPF Owner/Editor-in-Chief
Hi Asher,

Just a reminder about a very useful tool:
http://www.openphotographyforums.com/forums/showthread.php?t=9447

Also don't forget that the built in camera levels have a limited accuracy (approx. 1 degree, which is a lot of pixels), and that the sensor is also mounted within mechanical tolerances for rotation and orientation perpendicular to the optical axis.

Cheers,
Bart

Thanks for the reminder. I'll get that electronic leveler. Then one needs to accurately find any needed offsets. I guess one takes pictures of a level target with angle markings when the camera has been leveled and see what the offset is. We need the people and the walls vertical. The camera may be from one side at the back of the concert hall. So it's going to be ultimately tilted forward and rotated to the right, usually. Any special method you have?

Asher
 
Thanks for the reminder. I'll get that electronic leveler. Then one needs to accurately find any needed offsets. I guess one takes pictures of a level target with angle markings when the camera has been leveled and see what the offset is.

Yes, you can level your subject, then level the camera as you would do it on the spot, and shoot the level subject. If there is enough of a horizontal visible, then it is possible to count the number of pixels of rotation (angle = ATAN(height/width)) and figure out the angle of sensor rotation. It can also be done by shooting an image of the camera on a horizontal plane in a mirror. The sensor rotation (combined with any lens decentering) will create a sloping horizon.

We need the people and the walls vertical. The camera may be from one side at the back of the concert hall. So it's going to be ultimately tilted forward and rotated to the right, usually. Any special method you have?

With the camera pointing down at an angle, only the center of the stage will be perfectly vertical. Assuming you're positioned centered in front of the stage and up (which you don't seem to be), only the center of the image can be perfectly vertical (unless you used a T/S lens shifted down, like applying fall on a view camera). I'm not sure how important removing the converging verticals is, but they do give visual clues about the obvious shooting position, which is above the orchestra. So the best you can do is get the center verticals in the image vertical.

Cheers,
Bart
 
Top